
NW Ecobuilding Guild Green Home Tour 2024
H2D Architecture + Design and Carlisle Classic Homes are excited to announce that one of our recently completed new custom home projects will be featured on the NW Ecobuilding Guild's Green Home Tour on April 27, 2024. This home will be open for in person tours from 11am to 5pm on April 27th, 2024. Please follow this link to learn more and to register for the tour. This high-performance home, the Seward Park Industrial Custom Home, recently completed construction and boasts numerous cutting edge sustainable construction materials and methods, in addition to showcasing a variety of unique design features. Green features of this home include a highly insulated and efficient exterior envelope meeting Passive House air tightness standards, a Structurally Insulated Panel (SIPS) roof system, sustainably sourced wood products, and an efficient HVAC system for heating, cooling, and ventilation. The exterior of the home is built to optimize energy efficiency in the home and provide years of durability. The walls of the home are designed with a combination of products including cellulose insulation, Gutex interlocking wood fiber panel boards, air barrier meeting Passive House air tightness standards, rain screen system, and fibercement panel siding. The modern shed roof is built with Structurally Insulated Panels (SIPS). These technologies work together to provide a highly insulated system that reduces thermal bridging, creates a water resistant and airtight barrier, and allows moisture to escape. The HVAC system is designed for energy efficiency and to create a comfortable environment in the home. The SpacePak system installed in the home provides a multifunctional and multi-zoned system. The system includes in-floor radiant heating and cooling system installed in the exposed concrete floors for both floors of the home, as well as a high-velocity forced air heating, cooling and ventilation system. The home has multiple zones and is customized to provide the occupants with the heating and cooling they desire for the various spaces in the home. The HVAC system, as well as the lighting in the home, is set up with smart technologies allowing the homeowner to easily adjust settings directly in their smart app. Beyond the sustainable aspects of this home, this two-story structure is designed in an modern industrial style with numerous unique design features. The main floor of the home has an open plan with a kitchen, dining, and living room segmented with a three sided fireplace and wall of sliding glass doors leading out to an expansive deck with views of Lake Washington. The gourmet kitchen is designed with high end appliances, custom cabinetry, concrete countertops, custom steel pot rack, and wet bar. Other unique features in the home include a exposed steel beams, large cantilevered roof overhangs, spa-like primary bathroom with smart controls in the shower, wine cellar, office with custom built-ins, and home gym. The industrial modern styling of the home is expressed with exposed steel beams, industrial materials, polished concrete floors, and contemporary finishes. Learn more about the project here!
Past to Present: Unveiling the Timeless Allure of Powder Rooms
Real estate listings define a powder room, or powder bath, as a bathroom that consists of a toilet and single sink. It is typically located on the main floor, strategically tucked away for privacy while remaining conveniently adjacent to the living room, dining room, and kitchen. Powder rooms are functional, yes, but they also provide the opportunity to make a statement and introduce your guests to the overarching style of your home. History Lesson The term "powder room" traces its origins back to the 1700s when the elite class frequently adorned wigs, requiring regular primping and powdering. During this era, having a dedicated space for such grooming rituals was indicative of social standing and affluence. In the absence of modern plumbing, these rooms typically featured a dressing table, a plush stool, and, notably, a mirror. As plumbing advancements emerged, the room's purpose evolved, and the powder bath gained popularity during the post-World War II construction boom. With the rise of makeup use, the powder room became a sanctuary for a quick touch-up, coining the phrase "powder one's nose." From a privacy standpoint, the powder bath functioned as a dedicated space for guests, sparing them the need to encroach upon the more intimate areas of the home – this remains one of its key features. What Makes a Powder Room so Special? Today, the main components that make up the design of a powder bath include the toilet, sink, mirror, and light fixtures. Beyond these essentials, additional features such as tile, wallpaper, accent paint, wainscoting, and art can be seamlessly integrated to add a layer of intrigue. The allure of the powder room is its compact footprint – this allows a splurge in higher-end materials since the square footage is so minimal. It provides you with a space to create a jewel box within the home that speaks to its overall aesthetic in a more daring way. It can be moody, experimental, colorful, busy – all the things you may be too timid to try in other areas of the home. These design risks are safer done in a confined, capsule-like room. Plus, beauty can take precedence over function here; due to its limited usage, issues like steam, splashes, and other messes are less prevalent. Explore these inventive ideas to add a touch of creativity and charm to your powder bath: Statement Wallpaper: Choose bold, vibrant wallpaper with fun patterns or textures. Lighting: Opt for a pend ant (in lieu of a sconce) and integrate toe-kick lighting for a layered effect. Mirror Magic: Find a uniquely shaped or ornate mirror to serve as a focal point. Wall Treatments: Painted wood shiplap, wainscoting, or wood cladding on the walls will help set the tone of the space. Unique Faucets & Fixtures: Upgrade faucets and fixtures to unique and stylish designs that become conversation starters. Open Vanity or Pedestal Sink: Choose an open vanity or a stylish pedestal sink to give the illusion of more space and add a touch of sophistication. Bold Color Palette: Paint all walls, ceiling, trim, and door in a bold color to transport your guests. Vintage Touches: Incorporate vintage or antique elements such as hardware or fixtures. Considering a remodel that includes a powder bath? Connect with us, and let's work together to turn your vision into reality!
Stair Design 101
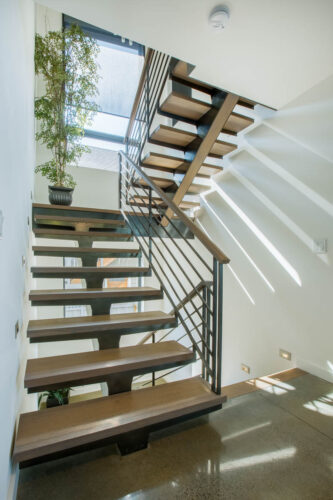
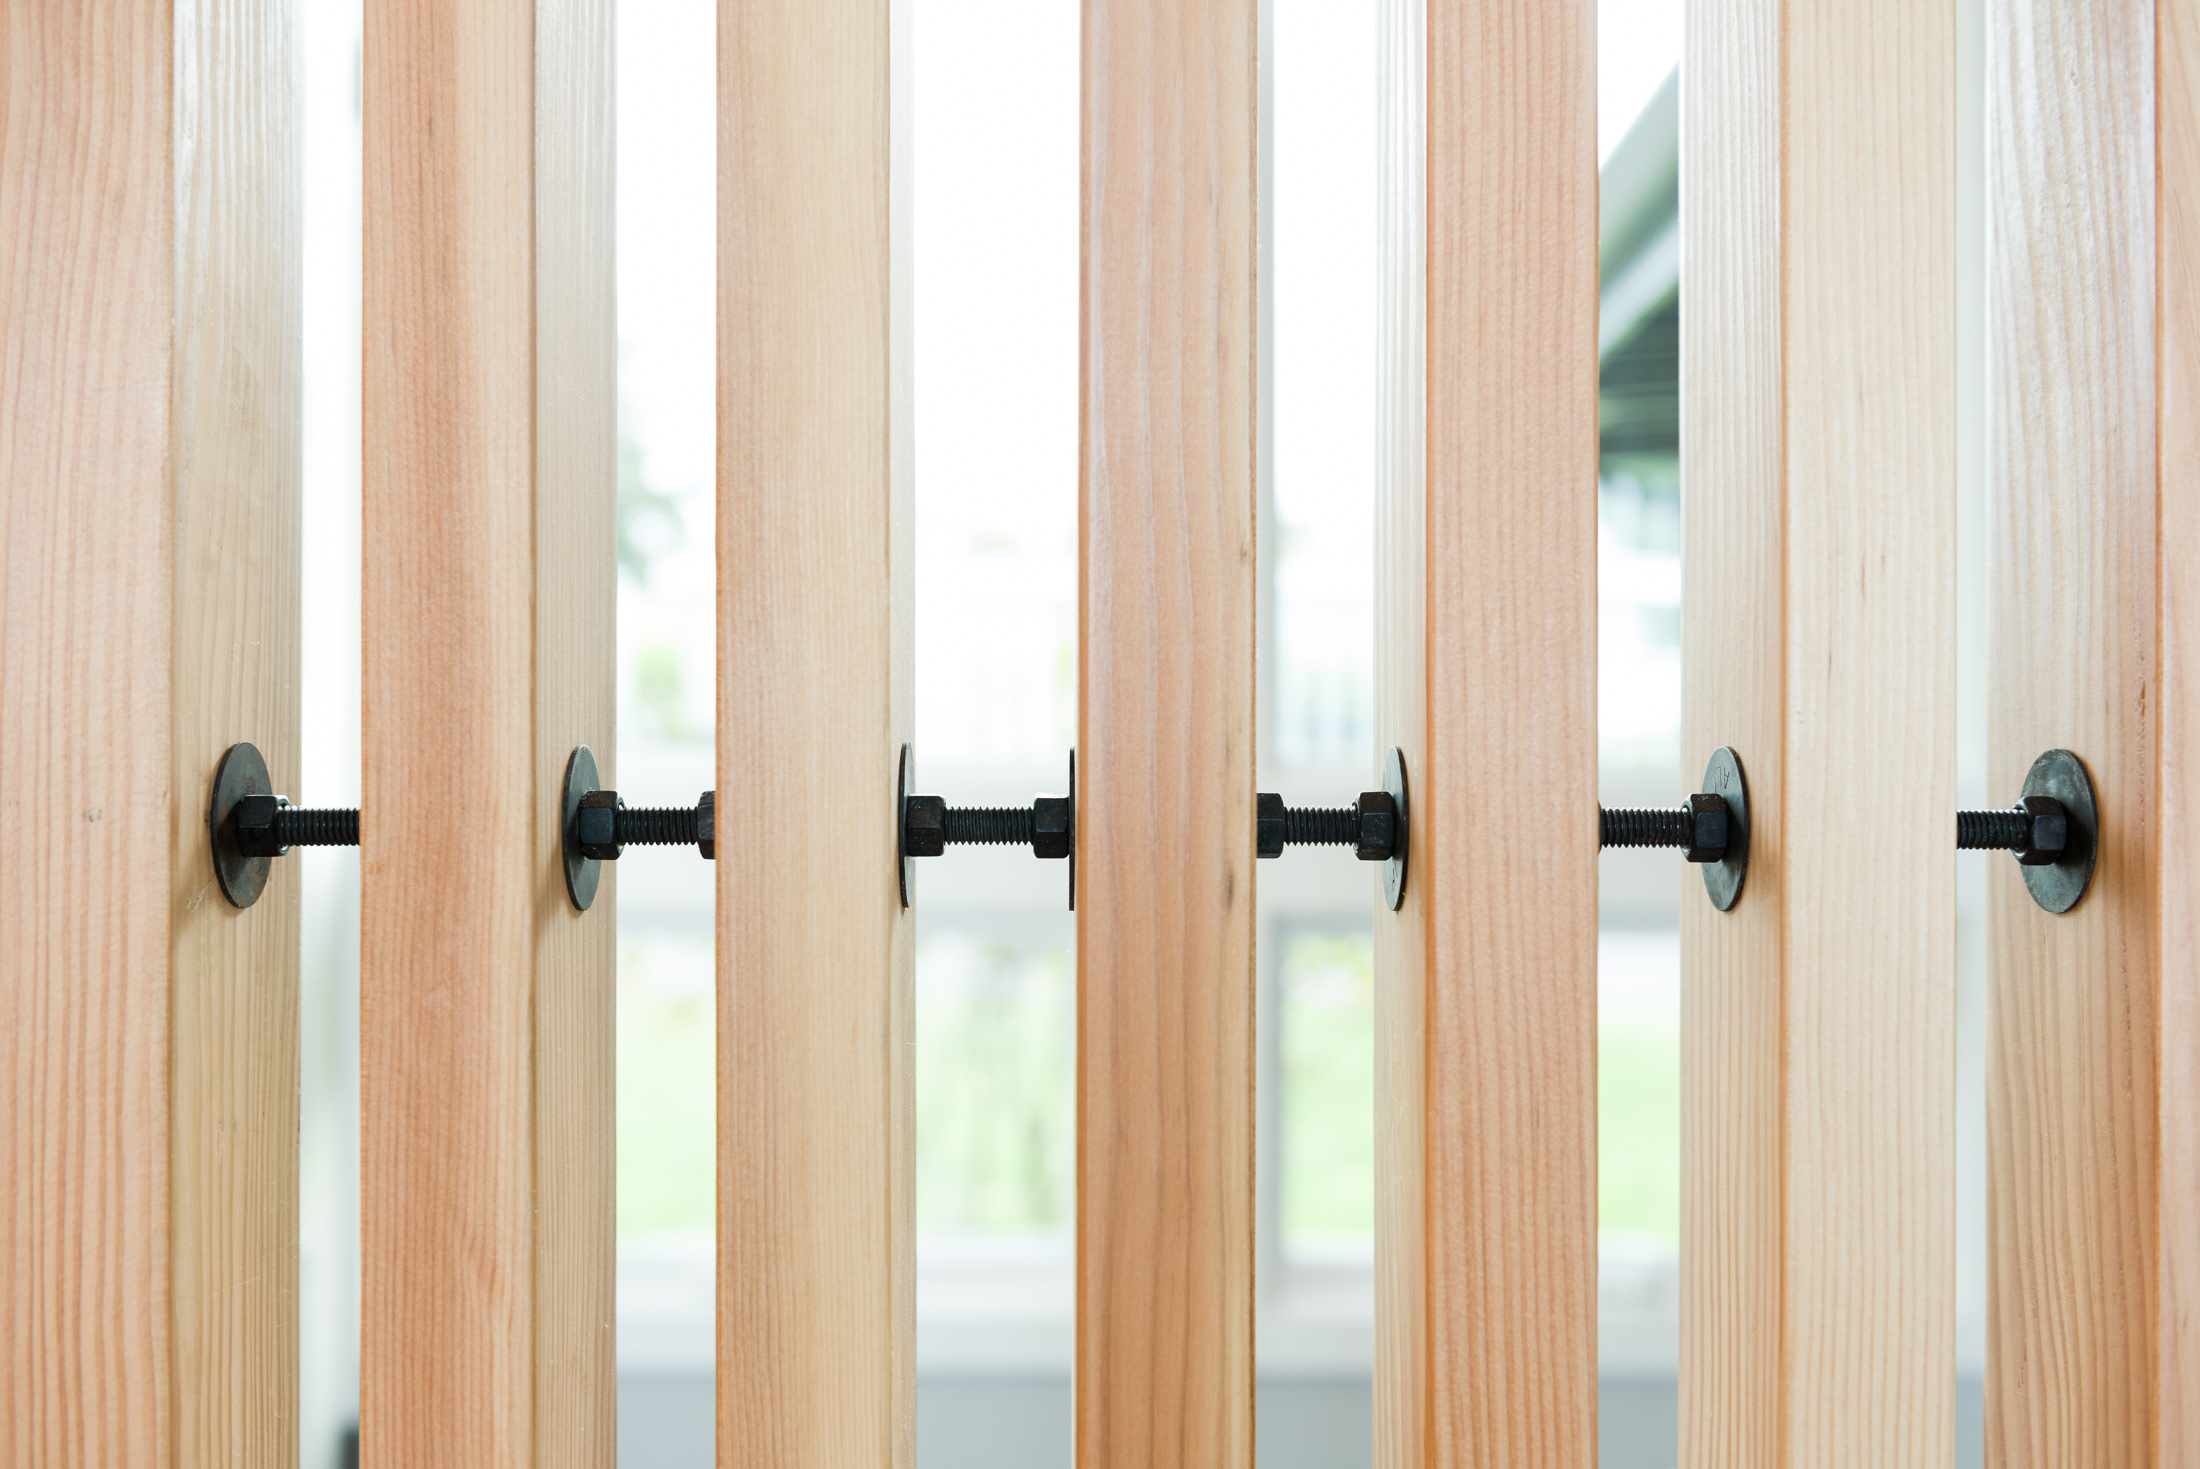
Whether you’re building new, adding on, or remodeling a multistory home there’s one element that can have a major impact on your space planning: stairs. With so many options on layouts and styles, this guide will help you get started on thinking about your stairs. Under most circumstances (and in most jurisdictions under the current code) there are a few basic requirements to keep in mind when planning for a new stair in a residential project. Must be at least 36” wide. Cannot have a riser higher than 7 ¾” (residential) The landing at the top and bottom of the stair must at minimum be as wide as the stair and the depth to match the stair width. Must have minimum 6’-8” clear head space between nose of riser and ceiling/finish above. There are a few exceptions for the above for stairs leading to attics and small lofts. Step 1: Stair Shapes There are many different types of stairs with unique space considerations and dimensions to keep in mind. Straight Run: The most common stair type, this stair goes in one straight line typically without any landings other than the top and bottom. Straight run stairs are a great fit for narrower spaces with a lot of length to work with. L-Shape: Much like the name indicates this stair has a landing somewhere in the run with a 90 degree turn. L-Shape stairs are great for small spaces as they can be tucked into a corner and leave a good amount of usable floor space. U-Shape: This stair is similar to the L-Shape but has a 180 degree turn at the landing. This stair is ideal for wider more generous spaces since they tend to take up more floor area than the other shapes. Spiral: A helical/circular stair more commonly used as an accent stair or in very small spaces. These stairs can have a great visual impact to a space but tend to be less safe than the other shapes and not recommended for areas with a lot of foot traffic. Step 2: Open vs. Closed It seems like a simple question, but there are pros and cons to having an open (railings on the sides so you can see into the adjacent spaces) or closed (walls on all sides) staircase. Here is a brief list of pros/cons: Open Stair pros: Visibility and connection into the spaces around the stairs Opportunity to introduce railing or slat wall design into the space Makes the stair an architectural feature of the space Open Stair cons: The biggest con for an open stair is sound travelling between floors and spaces. Open stairs are typically more expensive than closed stairs Closed stair pros: Keeps noise from travelling between floors and spaces Allows opportunity for doors at the top/bottom of the stair to add more security and sound dampening Typically less expensive than open stairs Closed stair cons: No visual connection between floors and spaces Step 2: Stair Construction The construction type of your stair can significantly change the look and style of your space, but it also has the most impact on the cost of your stair. While there are some up-charges to go from a straight run to a spiral stair shape, the construction type will be a major factor when it comes to budget. Here are just a few examples of construction types: Standard wood frame closed riser ($): This is the most common stair construction type. It’s the least expensive and does not require specialty engineering or construction. These stairs can be open or closed and finished with a variety of materials such as carpet or hardwood. Open riser with closed end ($$): An almost middle-ground between a floating stair and a closed riser stair, this option has “floating” treads between two stringers or walls. The stringers or sides of the stair can be wood or metal and will require some additional engineering. Steel stringer floating tread ($$$): One of the most desired modern stair designs we see requested by clients this stair has a single steel beam in the middle with “floating” treads. These stairs are a great feature for spaces but come at a high price and require specialty engineering and construction. Cantilever stair ($$$$): These stairs appear to “float” off the wall with only one side having a hidden connection point. They require meticulous engineering to ensure there isn’t too much flexibility on the ends furthest from the walls. There are a lot of other factors that go into designing the perfect stair for your home. Stay tuned for more blog posts getting into the fine details of stair design coming soon!
Elements of the Midcentury Modern Home
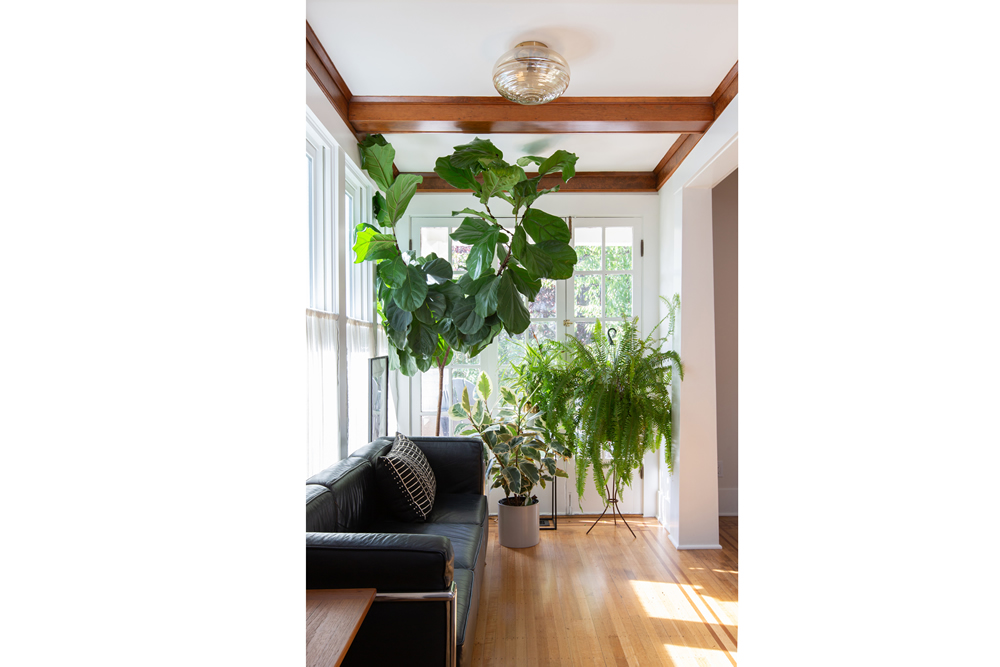
Part of the appeal of the midcentury modern style is it’s nostalgic feel. The furnishings and fixtures of the time utilize organic shapes and warm color palettes. Combine those themes with a modern backdrop… it is hard to go wrong! Also, you can easily integrate midcentury antique furniture or décor in any modern-leaning home without it feeling wildly out of place. Midcentury modern is an aesthetic that allows the new to come together with the old when remodeling or building new construction, creating a timeless and widely appealing home. Bridging the Past to the Present The midcentury modern style originated in the middle of the 20th century, after World War II. It’s clean-lined and simplistic look resulted from a backlash toward the more ornate traditional styles that came before. Today, midcentury modern (also known as “MCM”) is one of the most popular architectural and interior design styles. It is modern without being too cold or minimalist, and it’s retro vibe adds a touch of fun without the risk of being too trendy. Architecture & Interiors The architecture of the home is what you see first, and therefore should ideally represent the midcentury modern aesthetic. Some MCM architectural features might include… Low pitched shed and gable roofs, flat roofs Wood and stonework siding accents Concrete sitework & porches Extended eaves Horizontal lines Minimal adornment & trim work Asymmetrical features Clerestory and floor-to-ceiling windows Pop of color The interior design should reflect the architecture of the home and help round out the midcentury modern vision. Here are some design features found in the interiors of MCM homes: Vaulted ceilings often with wood cladding & exposed beams Teak, walnut, or oak wood species Walls with wood cladding/paneling Fireplaces with stone surround Light fixtures with globe shades Slab or flat panel doors Minimal trim work Multiple levels/sunken living rooms Straight set tile Geometric patterns Natural materials Pop of color MCM Today & Tomorrow If you’re looking to build a new home or renovate, going midcentury modern will not only yield an inviting and sophisticated space, it will also stand the test of time. Here are a few additional tips to successfully achieve this timeless look: Avoid trends – when in doubt, ask yourself if it would work in a 1950’s or 60’s home? Update without wiping out – For example, replace the pink ceramic bathroom tile of your truly midcentury home with something in the same size/pattern but with a new fresh color. Adapt for today’s world – Open up the main living spaces, make the kitchen larger than it would be 70 years ago Something old, something new – integrate classic pieces like the Eames lounge chair and Nelson Saucer pendant to help your new space feel connected to it’s MCM roots Furnishings, décor and accessories are the final touches that bring a design style together to form one cohesive look. Since the midcentury modern style is so widely popular, there is no shortage of resources to find the perfect items to go with your new space. With functionality and simplicity at the forefront, this design style is likely to remain popular for the long haul.
All About the ADU
All About the ADU You may have heard the term, “ADU”, and wondered exactly what it is and whether it’s an available option to add functionality and value to your own property. ADU stands for “Accessory Dwelling Unit” and is a secondary and separate living space on a single-family property with a primary dwelling unit. It is not to be confused with “duplex” or “two-family dwelling”, where both units will usually have their own addresses, utilities, and meters. ADUs can be attached to the primary dwelling unit (“AADU”) or detached and often located in a rear or side yard (“DADU”). Some other common terms for these kinds of units are mother-in-law (MIL), garage apartment, carriage house, or backyard cottage. Each jurisdiction will have its own terminology and definition, along with regulations on when and where it can be incorporated. For the unit to be legally rentable, the space will need to be permitted by the local jurisdiction specifically for this use. Increased Housing Density As the population increases, more and more jurisdictions have included allowances for ADUs and encouraged their creation to help with housing density issues. In some areas, regulations allow multiple ADUs on the property through a combination of attached and detached units. While some jurisdictions require the property owner to live in one of the units on the property, others don’t have this requirement adding the potential for an additional rental unit. Key Components of an ADU ADUs, whether attached or detached, will have their own separate entrance from the outside (AADUs will usually also have a lockable door leading into the primary dwelling unit or a “common” area). Jurisdictions will often specify this entrance be out-of-sight or shielded from view of the street. Separate off-street parking may or may not be required, depending on the jurisdiction. The ADU will need its own kitchen, bathroom, controllable heating system, and fire separation from the main dwelling unit. Electrical service is usually required to be provided through a sub-panel. Sometimes, “common” areas can be established between the ADU and primary units where equipment panels, utility equipment, and laundry may be located, allowing tenants of both spaces access without traveling through each other’s unit. A separate water shutoff may also be required. ADUs will be limited in allowed area, either through maximum square footage or a percentage of the primary dwelling unit area. For both existing un-heated spaces being converted into an ADU (such as a garage) or for new ADU construction (such as an addition or a new DADU), the ADU will often be treated as added floor area and will need to meet jurisdiction requirements for the property such as maximum gross floor area and energy code specifications. Common AADU Locations Some of the most common AADU locations to be established in existing homes are within a basement, within part or all of a ga rage (“garage conversion”), or within a main living area of the primary unit – often as an addition (or “bump-out”). For garage conversions, it is important to know whether a garage is required on the property, and separate garage space may need to be included. For basement units, the AADU entrance may require excavation to provide a door landing and steps leading up to grade, and a window well might be needed for a bedroom egress window. An existing “walk-out” basement is often an ideal space for an AADU. Common DADU Locations DADUs are most often a separate self-contained structure in the rear or side yard of a property. Jurisdictions sometimes have reduced setbacks to allow a DADU to be located closer to the property line than a primary unit. Height and area restrictions are used to keep the structure visually reduced in relation to the primary unit, and the exterior design is sometimes required to be in keeping with the primary unit for coherence. DADUs can also often be added over a detached garage. An exterior stair is usually used for access, so it’s important to have the space for this element. An upgrade to the foundation and existing walls is often needed for the added load above the existing garage walls. Is an ADU right for you? An ADU can add solid value to your property, and often requires a minimum of construction and permitting. Whether you have plans to add rental income to your property, or would like for an elderly parent, care-taker, or a college-aged child to be close to your home but have their own space, creating an ADU might be the right step for you to take. Written by: Sarah Thompson, project architect
NW EcoBuilding Guild Green Home Tour – April 29
H2D Architecture + Design and Carlisle Classic Homes are excited to announce that one of our recent projects will be featured on the Northwest EcoBuilding Guild Green Home Tour on Saturday, April 29, 2023! The featured home, the Nearly Passive Blue Ridge Custom Home, recently completed construction and is an amazing example of sustainable construction materials and methods, in addition to showcasing a variety of unique design features. This high-performance energy efficient home boasts cutting edge technologies for foundations, walls and ventilation systems combined with a beautiful design. The foundation is designed with ICF (insulated concrete forms) to reduce transfer of heat (thermal bridging). The walls are designed with a combination of products including cellulose insulation, Gutex interlocking wood fiber board panels, Zip sheathing and tape, Mento house wrap, and a mesh rain screen. These technologies work together to provide a highly insulated wall system with a continuous layer of insulation that reduces thermal bridging, creates a water resistant and airtight barrier, and allows moisture to escape. Other unique design features include an Attached Accessory Dwelling Unit (AADU) connected to the house with a hidden steel door, residential elevator for accessible access to all three floors of the home, gourmet kitchen, custom cabinetry with many numerous features, custom tile work, and great views of the Puget Sound. Learn more about this home at: https://nwgreenhometour.org/ghtoursite/near-passive-house-blue-ridge-home/. Please join us on the tour on April 29th! Get Your FREE Tickets for the 2023 NW Green Home Tour! Saturday, April 29, 2023 from 11:00am-5:00pm Sites spanning from Mt. Vernon to Seattle to Olympia to Portland The 2023 NW Green Home Tour is a FREE opportunity to see first-hand the many ways that environmentally conscious design and construction can benefit not only the planet as a whole, but your local community, your family, and you! This year’s tour features green building approaches that can put more money in your pocket by lowering your energy costs or even eliminating them altogether. We’ll show you remodels and new builds, backyard cottages, single-family residences, and co-housing units. The homes on our tour boast a variety of green building features and certifications, including Passive House, Built Green, and Net-Zero. Get your FREE tickets at nwgreenhometour.org/register Presented by the Northwest EcoBuilding Guild.
Celebrating the front porch
The front porch is not just a place to receive Amazon packages. The front porch is an extension of your home, a connection to the outdoors, and the place where you greet friends and neighbors and welcome them into your home. Life moments happen on the front porch! My kids know the drill… if it’s the first day of school, it’s pictures on the front porch. October 1st means stretching the 8-foot spider web between the porch columns to kick off the Halloween festivities. Strings of lights are hung across the porch roof during the holidays to brighten up the long, dark nights. The American flag waves proudly from the front porch, and if it’s College Game Day, the WSU flag flies. Go Cougs! If your home project allows, a covered front porch adds outdoor living space. Yes, we endure our share of rainy days here in the Pacific Northwest, but we enjoy warm, sunny days as well. Having a deep roof overhang gives protection from the elements almost year-round. Hang a porch swing, stage a couple of Adirondack chairs, make a statement with a custom bench, or if space allows, add a café table and chairs. A small furniture grouping welcomes visitors and says, “stay awhile!” The front door itself says “welcome home!” For added drama, consider an over-sized entry door. One that is wider and/or taller than a standard door. Add windows flanking the door, or a relight above the door, to further open up your space. Maybe you have a view that you want to take advantage of with a front door that is mostly glass. If structural changes are not an option, consider a replacement door in the same opening. A wood door with Craftsman detailing, or a modern, solid slab door will accentuate your entry and should compliment the style of your home. Giving your existing door a fresh coat of paint, with a new pop of color, is another great way to renew the entry to your home. Lighting is a key element in the design of any entry. Porch lighting should be warm and inviting, welcoming visitors to your front door. Wall sconces give good up-down lighting, washing the entry wall with general light. The light fixtures themselves can either be a design statement, an accent to the style of your home, or they can be designed to blend into the architecture of your home. If your space doesn’t allow adding a covered porch, other projects can have a big impact on your existing entry. Expand the approach to your front door by pruning mature landscaping. Install a new stone paver pathway and add pathway lighting – solar powered, for energy savings and ease of installation. Consider landscape lighting as well. Shine a spotlight on a favorite tree or two in the front yard, and when it’s dark the eye is drawn outside giving a sense of spaciousness to your entry. Widen the steps leading up to your front door for a more gracious feel. Don’t forget the details! There are several “smart” doorbells available now with cameras for added security. Consider installing smart outlets on your porch, for things like holiday lights, that can be controlled remotely. Steps illuminated with theater aisle lighting are a welcome feature. Last, but not least, be sure to install your house numbers in a location where they are easy to read. Whether you’re building a new home, planning a remodel or addition, or you simply want to freshen up the look of your space, don’t forget to celebrate the front porch! Written by: Cristy Weller, Architectural Designer at H2D Architecture + Design
Swim Spas versus In-ground Pools
Summertime means swimming – at the beach, in the river, or at the pool. It also means waiting for the weekend or “open” hours, then packing up your gear in the car (including the kids) and traveling to your destination. Want to enjoy swimming during the wintertime? Hopefully there’s an indoor pool or hot spring nearby. But what if you could swim in your own backyard? No travel necessary and “open” hours whenever you want! Private pools allow for not just the recreation of swimming, but also relaxing with your family and entertaining with your friends – any time of day, any day of the year. Thinking about installing a pool, but concerned with the costs, maintenance or whether there is even enough room on your property? You might want to consider a swim spa instead. What is a swim spa? Swim spas are similar to hot tubs but longer in one direction with powerful jets at one end. They are self-contained and have a one-piece molded interior with a heater and pumps for small and large jets, contained in a decorative cabinet for above-ground installation, or can be built into a deck or patio. They have traditional hot tub-style seating and jets at one end, but there is an open area in front of 2 or 3 “swim jets” at the other that allows for swimming or exercising against a strong and variable current. Swim spas are the width of a standard hot tub – about 8 feet – but can range in length from about 12 to 21 feet. The longest spas sometimes have a smaller hot tub at one end and a separate long swim tub at the other. Installation and cost comparisons The smaller footprint of swim spas means a smaller yard is not an impediment to enjoying aquatic recreation at home. Swim spas are often integrated into a deck or patio nearer to the house – sometimes installed within a covered or indoor space (perfect for the rainy Pacific Northwest weather). Because they are about 4’-6” tall, steps are needed for access and can be integrated into a surrounding deck design. In contrast, due to the size of in-ground pools, they often need to be set back farther from the house, with a larger deck or patio to provide access to and around the entire pool. Some jurisdictions’ limit on the hardscape area of a lot is such that a traditional-sized pool can be difficult or impossible to build - even if there is room in the backyard. A level concrete pad is required as a base for a swim spa (or a wood deck engineered and permitted to take the loads of the spa and water), and a permitted dedicated electrical circuit is required for the shutoff, but the costs of and timeline for construction and installation is a fraction of that required for a new in-ground pool. Swim spa delivery can require a crane if access to the yard is limited, but often can be hand-delivered through a side gate – with delivery and hookup taking a matter of hours. After filling the spa with water and allowing time for it to heat to a comfortable temperature (usually overnight) you’re ready to go! Compare this with permitting time for a new permanent in-ground concrete pool plus weeks of construction to install, with possible delays due to weather and ground conditions. Likewise, due to its smaller size, the average cost of heating a swim spa versus an in-ground pool is significantly less. Since smaller amounts of chlorine and other chemicals are needed to maintain clean water in the spa, these monthly maintenance costs are also much lower. In comparison to the swim spa, the greater monthly costs for heating and maintenance of a traditional in-ground pool drives many homeowners to “close” their in-ground pools during the winter months. Year-round comfort If you’ve dreamed about owning a swimming pool but also love the idea of a relaxing hot tub, a swim spa could be an ideal choice combining the best of these worlds. The design options are endless and can add value to your home by integrating a swim spa into a revitalized backyard with a new deck or patio, often combined with an outdoor covered living space or kitchen. And, since the costs and effort of keeping your swim spa heated throughout the year are minimal, it’s easy to pop into a heated spa even during the coldest winter for an exercise session or to relax in the steam and gaze up at the stars. Swim spas often come with a variety of amenities to enhance your enjoyment, including waterfall pillows, colored lights, and even an integrated sound system. There are several companies that sell them, with models that cater to everything from simple family recreation to athletic swim training. With such variety and versatility due to its size and cost, a swim spa could be just the thing to give your home that special touch and your family that much-needed recreation all in the privacy of your own backyard. Written and Photos by: Sarah Thompson, Project Architect
Tips for a home office
The necessity of a home office is growing with many people working from home as a result of the development of virtual conferencing, telecommunications technologies, and more recently Covid-19. It is important to have an efficient space that helps maintain focus and concentration. The need for good lighting and appropriate furniture is also key for success. A guest room, an attic space, a nook under the stairs, or another empty corner in the house can become a nice space to set up your home office. An area close to a window can provide natural light during the day to help keep you motivated. If a window location is not possible, a good table or desk lamp will also be a good alternative. Choose a quiet location or a space where distractions will be kept to a minimum. If you are frequently on calls or video conferencing, a quiet space will be important not only you, but also others in the home that you might bother during the calls. In addition to the location in the home, it is important to focus on surroundings and furniture to create an adequate work space. Among the innovative options for office furniture, the addition of a stand up desk is interesting because it encourages ergonomic best practices by allowing you to both stand and sit during the work day. A comfortable chair that provides adequate support is also important for you to maintain proper posture while sitting at a computer. In combination, choosing the right chair with an adjustable desk can consistently provide comfort throughout the day by allowing you to change position while keeping a computer and the desktop at an adequate level. Small details like boards and planners on the wall are a good idea to track work progress and schedules. If your table is small and does not have a drawer you can try to use shelves to organize papers and books. Lastly, a cup of coffee or tea is always welcome. For these and other design ideas you can follow us on Pinterest: https://www.pinterest.com/h2darchitects/ Written by: Maria Ribeiro, Architectural Designer at H2D Architecture + Design
Thinking of a planning a construction project during the Covid-19 outbreak?
Are you still thinking about your remodel or new construction project but are not sure about to approach it with the quarantine restrictions? Here at H2D, we are still open for business, but we have adapted our process to try to work with the changing times. Are you hesitant to call about your project as you don't want anyone coming to your home? Instead of coming to your home or commercial space, one of our architects or designers will meet with you virtually to do a walk through of your space. During the walk through, we will have you walk through the space with your cell phone, tablet or laptop camera while we will discuss the goals of the remodel, addition or new construction project. Following the walk through, we will discuss the design and construction process with you and answer any questions you may have. From our virtual meeting, H2D will provide you an estimate for your project. Give us a call at 206-542-3734 to discuss your construction project. We look forward to hearing from you!