
Celebrating the front porch
The front porch is not just a place to receive Amazon packages. The front porch is an extension of your home, a connection to the outdoors, and the place where you greet friends and neighbors and welcome them into your home. Life moments happen on the front porch! My kids know the drill… if it’s the first day of school, it’s pictures on the front porch. October 1st means stretching the 8-foot spider web between the porch columns to kick off the Halloween festivities. Strings of lights are hung across the porch roof during the holidays to brighten up the long, dark nights. The American flag waves proudly from the front porch, and if it’s College Game Day, the WSU flag flies. Go Cougs! If your home project allows, a covered front porch adds outdoor living space. Yes, we endure our share of rainy days here in the Pacific Northwest, but we enjoy warm, sunny days as well. Having a deep roof overhang gives protection from the elements almost year-round. Hang a porch swing, stage a couple of Adirondack chairs, make a statement with a custom bench, or if space allows, add a café table and chairs. A small furniture grouping welcomes visitors and says, “stay awhile!” The front door itself says “welcome home!” For added drama, consider an over-sized entry door. One that is wider and/or taller than a standard door. Add windows flanking the door, or a relight above the door, to further open up your space. Maybe you have a view that you want to take advantage of with a front door that is mostly glass. If structural changes are not an option, consider a replacement door in the same opening. A wood door with Craftsman detailing, or a modern, solid slab door will accentuate your entry and should compliment the style of your home. Giving your existing door a fresh coat of paint, with a new pop of color, is another great way to renew the entry to your home. Lighting is a key element in the design of any entry. Porch lighting should be warm and inviting, welcoming visitors to your front door. Wall sconces give good up-down lighting, washing the entry wall with general light. The light fixtures themselves can either be a design statement, an accent to the style of your home, or they can be designed to blend into the architecture of your home. If your space doesn’t allow adding a covered porch, other projects can have a big impact on your existing entry. Expand the approach to your front door by pruning mature landscaping. Install a new stone paver pathway and add pathway lighting – solar powered, for energy savings and ease of installation. Consider landscape lighting as well. Shine a spotlight on a favorite tree or two in the front yard, and when it’s dark the eye is drawn outside giving a sense of spaciousness to your entry. Widen the steps leading up to your front door for a more gracious feel. Don’t forget the details! There are several “smart” doorbells available now with cameras for added security. Consider installing smart outlets on your porch, for things like holiday lights, that can be controlled remotely. Steps illuminated with theater aisle lighting are a welcome feature. Last, but not least, be sure to install your house numbers in a location where they are easy to read. Whether you’re building a new home, planning a remodel or addition, or you simply want to freshen up the look of your space, don’t forget to celebrate the front porch! Written by: Cristy Weller, Architectural Designer at H2D Architecture + Design
Swim Spas versus In-ground Pools
Summertime means swimming – at the beach, in the river, or at the pool. It also means waiting for the weekend or “open” hours, then packing up your gear in the car (including the kids) and traveling to your destination. Want to enjoy swimming during the wintertime? Hopefully there’s an indoor pool or hot spring nearby. But what if you could swim in your own backyard? No travel necessary and “open” hours whenever you want! Private pools allow for not just the recreation of swimming, but also relaxing with your family and entertaining with your friends – any time of day, any day of the year. Thinking about installing a pool, but concerned with the costs, maintenance or whether there is even enough room on your property? You might want to consider a swim spa instead. What is a swim spa? Swim spas are similar to hot tubs but longer in one direction with powerful jets at one end. They are self-contained and have a one-piece molded interior with a heater and pumps for small and large jets, contained in a decorative cabinet for above-ground installation, or can be built into a deck or patio. They have traditional hot tub-style seating and jets at one end, but there is an open area in front of 2 or 3 “swim jets” at the other that allows for swimming or exercising against a strong and variable current. Swim spas are the width of a standard hot tub – about 8 feet – but can range in length from about 12 to 21 feet. The longest spas sometimes have a smaller hot tub at one end and a separate long swim tub at the other. Installation and cost comparisons The smaller footprint of swim spas means a smaller yard is not an impediment to enjoying aquatic recreation at home. Swim spas are often integrated into a deck or patio nearer to the house – sometimes installed within a covered or indoor space (perfect for the rainy Pacific Northwest weather). Because they are about 4’-6” tall, steps are needed for access and can be integrated into a surrounding deck design. In contrast, due to the size of in-ground pools, they often need to be set back farther from the house, with a larger deck or patio to provide access to and around the entire pool. Some jurisdictions’ limit on the hardscape area of a lot is such that a traditional-sized pool can be difficult or impossible to build - even if there is room in the backyard. A level concrete pad is required as a base for a swim spa (or a wood deck engineered and permitted to take the loads of the spa and water), and a permitted dedicated electrical circuit is required for the shutoff, but the costs of and timeline for construction and installation is a fraction of that required for a new in-ground pool. Swim spa delivery can require a crane if access to the yard is limited, but often can be hand-delivered through a side gate – with delivery and hookup taking a matter of hours. After filling the spa with water and allowing time for it to heat to a comfortable temperature (usually overnight) you’re ready to go! Compare this with permitting time for a new permanent in-ground concrete pool plus weeks of construction to install, with possible delays due to weather and ground conditions. Likewise, due to its smaller size, the average cost of heating a swim spa versus an in-ground pool is significantly less. Since smaller amounts of chlorine and other chemicals are needed to maintain clean water in the spa, these monthly maintenance costs are also much lower. In comparison to the swim spa, the greater monthly costs for heating and maintenance of a traditional in-ground pool drives many homeowners to “close” their in-ground pools during the winter months. Year-round comfort If you’ve dreamed about owning a swimming pool but also love the idea of a relaxing hot tub, a swim spa could be an ideal choice combining the best of these worlds. The design options are endless and can add value to your home by integrating a swim spa into a revitalized backyard with a new deck or patio, often combined with an outdoor covered living space or kitchen. And, since the costs and effort of keeping your swim spa heated throughout the year are minimal, it’s easy to pop into a heated spa even during the coldest winter for an exercise session or to relax in the steam and gaze up at the stars. Swim spas often come with a variety of amenities to enhance your enjoyment, including waterfall pillows, colored lights, and even an integrated sound system. There are several companies that sell them, with models that cater to everything from simple family recreation to athletic swim training. With such variety and versatility due to its size and cost, a swim spa could be just the thing to give your home that special touch and your family that much-needed recreation all in the privacy of your own backyard. Written and Photos by: Sarah Thompson, Project Architect
Outdoor Living Spaces in the PNW
It goes without saying that the pandemic taught us many things – one of them being the value of a good outdoor living space. Unfortunately, creating outdoor living spaces in the Pacific Northwest poses one major challenge – the weather. We all shivered through drinks at bar patios and tried to convince ourselves this was normal (and we weren’t cold). Though we may not be able to shake those 30-degree days, there are ways to create an outdoor space that can be used rain or shine! The first step is to see what you’re working with; This will be determined by your budget and available space. If you’re building a new home or addition, it’s important to call out your desire for an outdoor living space during the schematic design phase – especially if you want it to be covered. There are many possibilities when starting from scratch, but there are also ways to retrofit your existing outdoor space to add style and comfort. Covered Spaces Protection from the rain is crucial if you wish to use an outdoor space year-round. The best way to accomplish this is building a roof over a deck or patio. This will ensure the best waterproofing, and allow you to install more built-in accessories like lighting or ceiling heaters. If your budget or the design of your home doesn’t allow for a new roofed space, detached pergolas are a great option. For example, Struxure pergolas are metal pergolas designed with louvers that can open and close with the push of a button (or through an app), and offer options to add lighting, heaters, and fans as well. Heat The next way to create a comfortable space outdoors is by adding a heating element (or two). Fireplaces, firepits, and heaters (ceiling or freestanding) are your best options. Consider how much space you have, if it’s covered or not, and how you envision using the space to help determine which option is best for you. Hot tubs are also a great way to relax and warm up outside! Cooking Barbequing and dining al-fresco are wonderful ways to get the most out of the Summer. Your setup can range from a freestanding BBQ on the deck to a full-scale, covered outdoor kitchen. A few things to consider: how much do you barbeque? Do you want your dining space to be covered? Do you require a sink, mini-fridge, or other kitchen components? Space and budget will determine how far you can go here, but imagine how fun it would be to have a brick pizza oven in your backyard! Finishing Touches Time to complete your new outdoor space with furniture and accessories. Though sourcing these items is not within an architect’s scope, we recommend selecting outdoor-rated furniture that is both comfortable and, most importantly, sure to last many seasons. You might also want built-in speakers or a television – those components will need to be called out very early on so that they can be hardwired. Twinkle lights, rugs, and firepit tables are other great additions to make your outdoor space feel cozy even on those chilly nights. Bringing Outdoors In If none of those options are for you, it may be time to think outside of the box and bring the outdoors inside instead of the other way around. This approach is ideal if it’s not feasible to add a covered outdoor space but you want the feel of the open-air during those warmer months. Large accordion doors like NanaWall allow you to open a whole wall up to your deck or patio. As a result, your indoor spaces will flow seamlessly into your outdoor space, creating an expansive feel. The downside here is the steep cost and the potentially low usage in a climate like ours.
Tips for Avoiding Unnecessary Stress During Construction
You’ve received approved permits for your project - yay! Although it may have been quite an arduous process to get to this point, the hardest part often lies ahead in construction. Anyone who’s experienced a remodel or built a new home will tell you how stressful it can be. One thing that might help is being prepared, having realistic expectations, and communicating clearly with your builder. In this article, we’ll review some ways you can set yourself up to avoid unnecessary issues throughout the construction phase. Be Prepared Many builders prefer to have all design selections made prior to bidding the project or at least starting construction. There are a few reasons why this is important - knowing what fixtures and finishes you have decided on enables them to provide a more realistic budget, order materials on time, and prepare or rough-in the spaces according to product requirements. You might find it hard to make a final decision on key design features like light fixtures and tile, but waiting until the last minute to order items can cause significant delays and backtracking. One sure way to avoid shipping delays is to select fixtures and finishes that are stocked locally. If the item you want is special order or shipping from afar, it’s crucial that the builder is aware so that they place the order in time. Trades will come in to rough-in for plumbing, electrical, and HVAC, so having those fixtures selected well ahead of time ensures that they will set everything up accordingly. For example, if you have specified a wall mount faucet in the powder bath, the plumber will need to know how high you’d like it mounted and the distance between the valves on the fixture itself. This is also where interior elevations play a crucial role. The interior elevations will represent where fixtures should be installed and how they interact with each other in the space. The cabinet layout will also be shown in these drawings; they will be shared with the cabinet manufacturer who will then draw up their own shop drawings. Make sure that you’ve thoroughly reviewed and approved all of the drawings before construction begins, working with us to revise as needed. Set Expectations & Communicate Clearly Executing designs in real life is no easy task, even for professionals. Often times, builders struggle most with managing the homeowner’s expectations. In your initial meeting with your builder, make sure to tell them the method of communication you prefer, what you expect in terms of updates (daily, weekly, as needed, etc.), and any other considerations you’d like them to make while construction is occurring. If you don’t communicate your needs, builders (similar to designers) will make assumptions as to what your expectations are based on their experiences with previous clients. Reviewing this at the start of the project will help get everyone on the same page and open up communication lines early on. There will, no doubt, be some surprises along the way. Many of the hurdles that arise through construction are not at the fault of the builder, so approaching those issues from a place of understanding will help avoid unnecessary tensions. If your builder did make a mistake, communicating how you expect them to remediate the situation in a calm manner will help you move forward gracefully. You will be dealing with your builder for at least a couple of months, and it can make a huge difference if all parties agree to put an extra effort in to help the construction process go smoothly. Contact us if you’re interested in working with us and would like more information about how we help navigate the construction (and pre-construction) process with you and your builder.
How to Find the Balance Between Timeless and Trendy Interior Design
A common concern we hear from our clients is how they can make selections for their remodel that will not go out of style in the next few years. Selecting finishes and fixtures for your home can be daunting and potentially confusing, especially if you’re worried about making smart and timeless choices. Interior finishes and fixtures are like a wardrobe for your house. Imagine if you had to wear the same outfit every day. What would you pick? I bet it wouldn’t be the bright orange and white striped T-shirt, the hot pink shoes, or the sequin sweater. Even if you love those items of clothing individually, that doesn’t mean they’d look good together, or that you’d love them day after day for 10-30+ years. You might, however, consider adding a bold necklace or bright red socks that add little hints of character to a more neutral backdrop. It’s all about balance. Browsing for Inspiration It’s easy to swoon over inspiration photos – we’ve all been there. Something catches your eye and you find yourself daydreaming about living in that space. The aesthetic might be something you haven’t seen before - it might showcase some crazy chandelier or have a bold paint color on the walls. Not to mention, everything in the photo is tidy and organized, brand new, and the budget was incredibly high. Try to see past the shine and notice what it is specifically that you’d like to see in your new space. Here are a few questions you can ask yourself when reviewing inspiration photos: Is there a specific thing in the photo you like OR do you like it’s whole vibe? Is this a style you admire but feels out of your comfort zone? How would your furniture look dropped into this space (if you’re keeping it)? Does it feel like you? Can you see yourself and your household living there? Also, if you’ve been working on a Pinterest board or Houzz ideabook over a long period of time, you may notice that you don’t even like some of the older posts on the page that you were once obsessed with. This is why it’s important to check in with yourself and make sure that what you’ve started liking after spending more time browsing online is still in line with your general style, and not just the latest new thing. Emphasis is Key Find areas where you can have a little fun! Emphasis is key to good design. Rather than picking all unique, brightly colored tiles for the bathroom, use a unique tile just for the backsplash or shower niche against a neutral palette so that it pops. Here are some examples of where it is safer to take risks; most of these items can be swapped out somewhat easily or inexpensively in a few years if you remodel or decide to sell: Cabinet pulls/knobs Paint colors Light fixtures Faucets and shower trim Door levers/knobs Here are examples of where to stick with neutral colors and classic designs: Cabinetry Tile (unless in small quantities) Doors Hardwood flooring Reality Check It might be helpful to contemplate your current or past residences – what did you like or dislike about the design style or selections? Also, think about the logistics of how long you plan to stay in the house. I am all for selecting products that you’re in love with, but consider what the next buyer might think and maybe go more subtle. Most importantly – stick to what feels true to you because it is, after all, your home. Written by: Lauren Groth, Interior Designer with H2D Architecture + Design

Navigating Interior Design Decisions for a Home Remodel
Selecting finishes and fixtures for a remodel is fun and exciting, but it can be very overwhelming if you feel uncertain about the style you are going after. Though many people initially know what they like, there are so many images out there that can pull you in different directions and lead you to feel unsure of how to make those ideas come together cohesively. To make things more complicated, many of our clients are making decisions with their spouse or partner. This can potentially to lead to frustration, but our aim is to help our clients get on the same page and make compromises where necessary so that their completed home will be adored by all parties! Though I’m no marriage counselor, here’s a few steps to help this process go smoothly from the start: Step 1: Individually make a list of needs and wish list items for the remodel. Try to stick to high-level at this point. If you are on the same page, that’s great – but most couples have at least a few discrepancies. Next, you should combine your separate lists into one that captures the items of highest importance from both lists. Step 2: Create a shared collection of inspiration photos using Houzz, Pinterest, or saving pictures in a folder. Try to add notes to the photos you contribute that explain what you like about that space. There will likely be conflicting styles represented in the photo collections, but spending some time reviewing them will help you see what design ideas excite you most. Step 3: Pick a style direction. Although you already have inspiration photos that communicate the design direction you wish to achieve, it is helpful to try to classify the design style with a couple of words as well. Below is a quick style survey you can fill out together and/or separately. Circle your preferences from 1-5 in the categories below: MINIMALIST 1 2 3 4 5 LIVED-IN Clean & utilitarian; you prefer everything to be buttoned up Homey & real; you prefer a space that is allowed to be messy MONOCHROMATIC 1 2 3 4 5 COLORFUL Neutral colors only Color everywhere you look FORMAL 1 2 3 4 5 RELAXED Serious & high-end Casual & approachable CURRENT 1 2 3 4 5 RETRO/ CLASSIC Trendy design with fads & latest technology at the forefront You want designs that reflect a certain time period in design SOFT & NEUTRAL 1 2 3 4 5 RUGGED & BOLD Pale colors and light wood tones, spa-like Deep/rich colors, dark wood tones, textural GLAM 1 2 3 4 5 UNDERSTATED Shiny & showy; think fancy chandeliers Design that doesn’t call attention to itself; somewhat utilitarian URBAN 1 2 3 4 5 RUSTIC City loft, sleek, youthful Cabin or farmhouse, raw materials MODERN 1 2 3 4 5 TRADITIONAL Clean-lined & simple, utilitarian design Ornate details and classic inspiration Step 4: Let us work our magic! We will utilize your lists, photos, surveys, and n otes to come up with the best design possible. We can provide 2-3 schemes to help you explore different aesthetics for each space; this is especially helpful if you’re stuck between two opposing styles, or would like to see a couple different ways one style can be expressed in your home. From that point on, we work together to fine tune the actual selections you would like to go with. If you are a couple, this is where that compromise comes into play again. All said and done, our goal is to give you the process and tools to bring your dream home into reality in a stress-free, organized, and enjoyable way. Written by: Lauren Groth, Interior Designer with H2D Architecture + Design
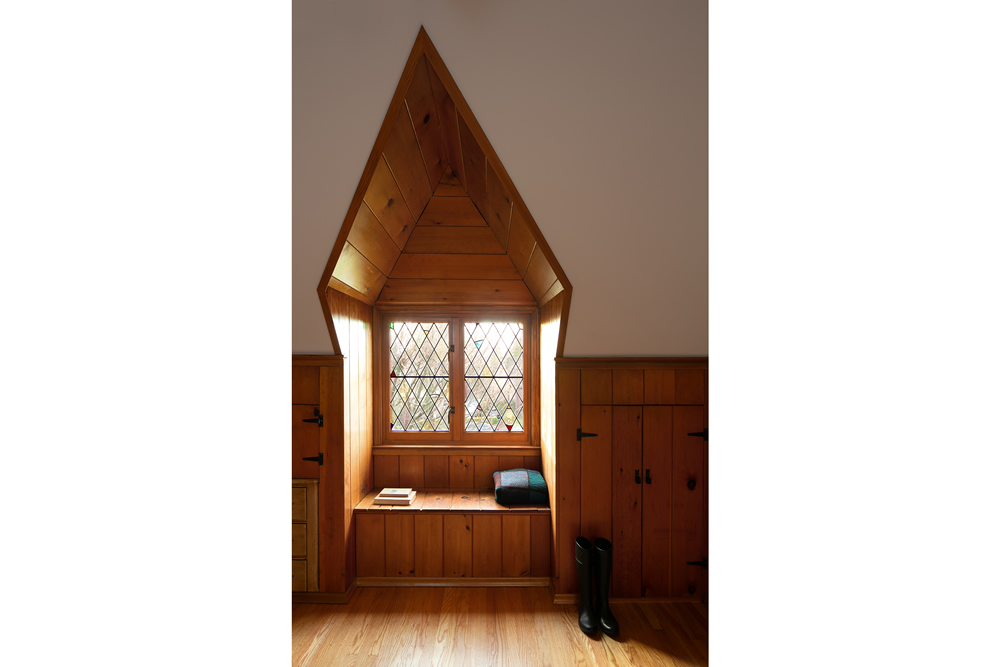
Attic Renovation Checklist
Attic Renovation Checklist Converting attic space to living space is a fantastic way to add living space to your home within its existing footprint. It sounds simple enough, but there are quite a few factors to consider when exploring an attic renovation design: Roof Framing: Converting an attic to living space almost always requires some structural work to meet minimum ceiling height codes (item #2 below). If your current attic has trusses, it makes things a bit more complicated but not impossible. The trusses will need to be replaced with new framing per a structural engineer’s requirements. If your attic is already stick-framed, an engineer will evaluate the existing framing and make suggestions to either use what is there or install sister-framing to the existing. The exact framing requirements will vary per project. Interior Space Dimensions: Codes will vary from jurisdiction to jurisdiction, but you find that all will have minimum requirements for a live-able attic space regarding ceiling heights and floor area. City of Seattle for example requires that at least 50% of the space having ceiling heights of 7’-6” or greater and the space shall not be less than 7ft in any plan dimension. If your existing attic space does not meet these requirements a dormer may be necessary to gain additional ceiling height and/or floor space. Access: Most attics have a hatch with a ladder for access. If your attic is converted to living space a code-compliant set of stairs will be required. Minimum requirements for a stair are: minimum 36” wide, minimum 6’-8” of clear headroom the entire walking length of the stairs, 10” deep treads, maximum 7 ¾” risers. Floor Joists: Most attic spaces are not designed to handle people walking on the floor. Often times with an attic conversion a new floor system will be required to handle the new loads (people, furniture, etc). This additional framing space needs to be accounted for when calculating stair requirements, ceiling requirements, and feasibility. If you’re thinking about an attic conversion project and want to discuss feasibility - contact us! We are happy to walk through the requirements and the possibilities your space has to offer.
Tips for a home office
The necessity of a home office is growing with many people working from home as a result of the development of virtual conferencing, telecommunications technologies, and more recently Covid-19. It is important to have an efficient space that helps maintain focus and concentration. The need for good lighting and appropriate furniture is also key for success. A guest room, an attic space, a nook under the stairs, or another empty corner in the house can become a nice space to set up your home office. An area close to a window can provide natural light during the day to help keep you motivated. If a window location is not possible, a good table or desk lamp will also be a good alternative. Choose a quiet location or a space where distractions will be kept to a minimum. If you are frequently on calls or video conferencing, a quiet space will be important not only you, but also others in the home that you might bother during the calls. In addition to the location in the home, it is important to focus on surroundings and furniture to create an adequate work space. Among the innovative options for office furniture, the addition of a stand up desk is interesting because it encourages ergonomic best practices by allowing you to both stand and sit during the work day. A comfortable chair that provides adequate support is also important for you to maintain proper posture while sitting at a computer. In combination, choosing the right chair with an adjustable desk can consistently provide comfort throughout the day by allowing you to change position while keeping a computer and the desktop at an adequate level. Small details like boards and planners on the wall are a good idea to track work progress and schedules. If your table is small and does not have a drawer you can try to use shelves to organize papers and books. Lastly, a cup of coffee or tea is always welcome. For these and other design ideas you can follow us on Pinterest: https://www.pinterest.com/h2darchitects/ Written by: Maria Ribeiro, Architectural Designer at H2D Architecture + Design
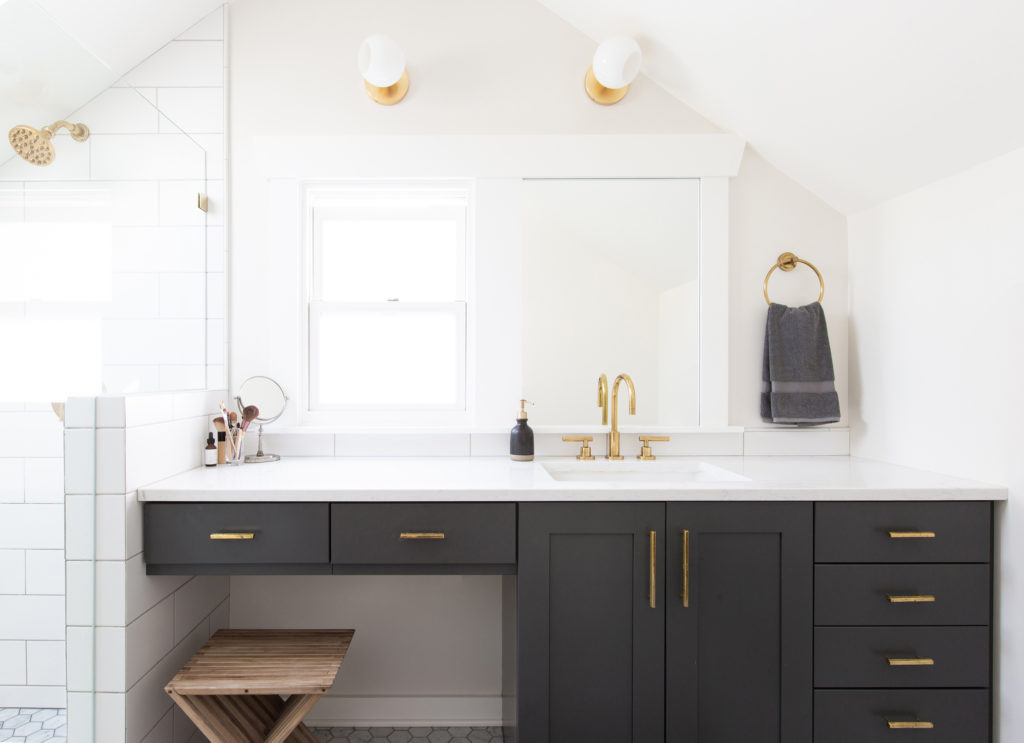
Kitchen Form and Functionality
Photo by Nathaniel Willson. © Nathaniel Willson 2018. All rights reserved. The kitchen is unarguably the hub of the modern-day home. It’s where meals get made, drinks get poured, children plop down for breakfast and so much more. It’s become a very social space but has a history of being behind closed doors. Most homes built before the 60s or 70s were designed with the kitchen adjacent to the dining room; a wall separating the two. Often kitchens had a small nook for an informal breakfast table, but it was never where guests were encouraged to gather for dinner parties. However, the kitchen has a way of drawing people in. Life has become less formal in many ways and hosts no longer care about keeping meal prep behind the scenes if it means they have to be isolated from the rest of the party. Hence the onset of “open floor plans”. Kitchens today also must include a space for guests to sit and engage with their hosts – the kitchen island or peninsula. The kitchen island is the number one request we hear for kitchen remodels. It has become such a staple and has evolved in shape and size. The island encourages involvement in the cooking and entertaining process, provides a place to eat casual meals, adds generous storage, and creates a closer working triangle. When designing a kitchen layout from scratch, it is important to start with function. The working triangle is the efficiency goalpost for kitchens – it is the path connecting the primary zones of the kitchen: sink, range, and refrigerator. A good working triangle makes moving in the kitchen seamless and quick. An elongated triangle usually means that one item is much further out of the way and causes you move slower and sometimes less safely. There is also a secondary triangle made up of the sink, dishwasher, and storage – this path is most used in cleanup and is also quite important because who wants that part to take any longer. Understanding the kitchens of the past help us design more functional kitchens, keeping our current way of life in mind. There will always be new trends, changes in entertaining styles, and technology advancements that evolve kitchen design. Ultimately, it’s up to us to hear the client’s specific desires and provide them with ideas and solutions that work for them and their family. Written by: Lauren Groth, Interior Designer at H2D Architecture + Design
Thinking of a planning a construction project during the Covid-19 outbreak?
Are you still thinking about your remodel or new construction project but are not sure about to approach it with the quarantine restrictions? Here at H2D, we are still open for business, but we have adapted our process to try to work with the changing times. Are you hesitant to call about your project as you don't want anyone coming to your home? Instead of coming to your home or commercial space, one of our architects or designers will meet with you virtually to do a walk through of your space. During the walk through, we will have you walk through the space with your cell phone, tablet or laptop camera while we will discuss the goals of the remodel, addition or new construction project. Following the walk through, we will discuss the design and construction process with you and answer any questions you may have. From our virtual meeting, H2D will provide you an estimate for your project. Give us a call at 206-542-3734 to discuss your construction project. We look forward to hearing from you!